Comprehensive Guide for Framer CMS
Check out the comprehensive guide for Framer CMS. Design and manage dynamic website content visually. Learn features, setup steps, and tips to build scalable, responsive sites easily.

What is CMS?
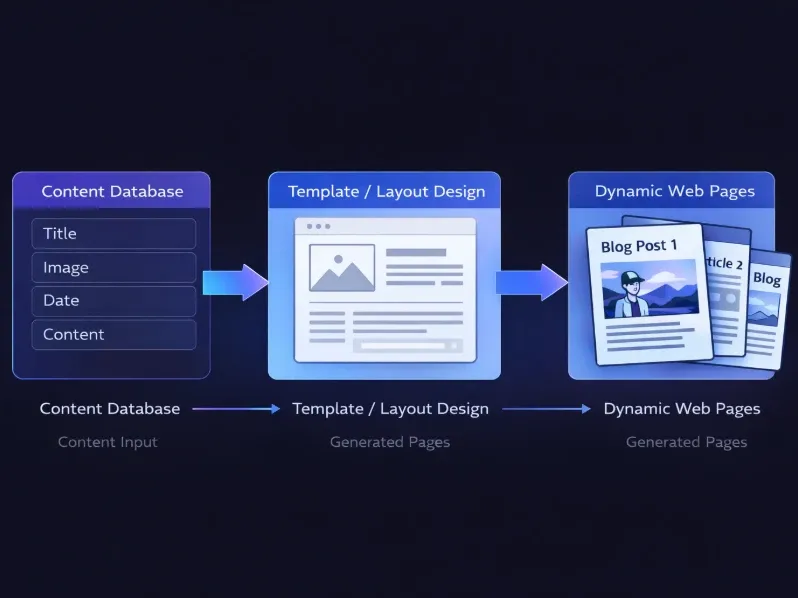
A Content Management System (CMS) is a system that allows you to create, manage, and update website content without manually designing every page.
For example, instead of designing 20 different blog pages, you:
Create one blog layout
Store content inside a structured database
Automatically generate dynamic pages
This makes content management faster, scalable, and more organised.
What is Framer CMS?
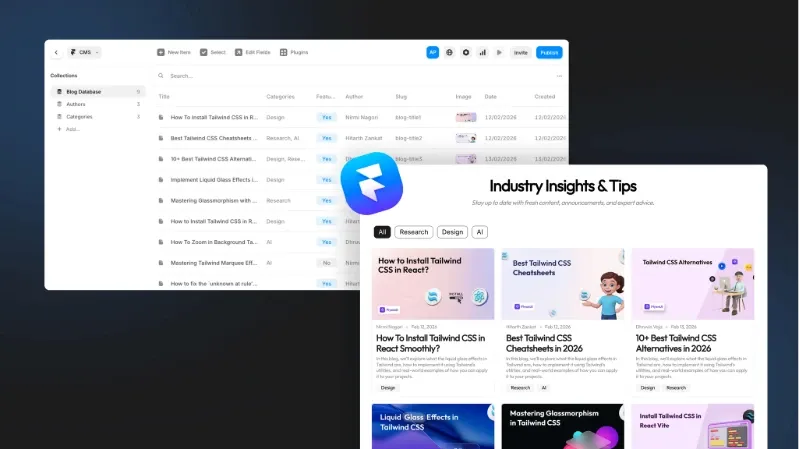
Framer CMS is Framer’s built-in content management system that allows you to create dynamic websites like blogs, portfolios, directories, and job listings directly inside Framer.
When building a blog using Framer CMS, we can:
Store blog posts inside a Collection
Create a Blog Listing page
Automatically generate a Blog Detail page
Apply filters, sorting, and pagination
Once your structure is ready, adding a new blog post automatically updates your website.
Understanding Key Framer CMS Terms
The following terms are explained in the context of the blog listing page and the individual blog detail page. In the following sections, we will understand each of them with practical examples to make the concepts clearer and easier to apply.
Collection
A Collection is like a database that stores and organizes all your blog content. It stores data for every blog post and automatically powers both the blog listing page (where all posts appear) and the individual blog detail pages (where each post is displayed separately).
New Item
A New Item refers to a new blog post added to the Collection. It represents a new blog post on the listing page and automatically generates its own dynamic blog detail page. Once added, the item appears in the blog list and has a dedicated page where the full content is displayed.
Edit Fields
Edit Fields define what data each blog post contains (Title, Slug, Cover Image, Date, Content), which is displayed on both the listing card and detail page.
Plugins / Integrations
Plugins in Framer CMS allow you to import and export data seamlessly, such as syncing content from Google Sheets, exporting CMS data, or connecting with Notion.
Index Page
The Index Page (e.g.,
/blog) displays multiple blog posts dynamically using a CMS List connected to the collection.
Detail Page
The Detail Page (e.g.,
/blog/post-slug) displays the full content of a single blog post selected from the listing page.
Reference
A Reference field connects a blog post to one related item (such as a Author Detail) helping filter posts on the listing page.
Multi-reference
A Multi-reference field connects a blog post to multiple related items (such as Tags or Categories), useful for filtering and showing related posts.
Filter
A Filter controls which blog posts appear on the listing page based on selected conditions (for example, Category = Design).
Sorting
Sorting arranges blog posts on the listing page, such as displaying the newest posts first.
Pagination
Pagination divides blog posts into multiple pages when there are many items, improving performance and readability.
Condition (Conditional Visibility)
A Condition shows or hides elements based on rules, such as displaying a “Featured” badge only when a blog post is marked as featured.
Step-by-Step: Create Blog Listing & Detail Page in Framer
Let’s now build a complete blog system using Framer CMS.
Step 1: Create the Blog Collection for Blog Post
1. Open your Framer project
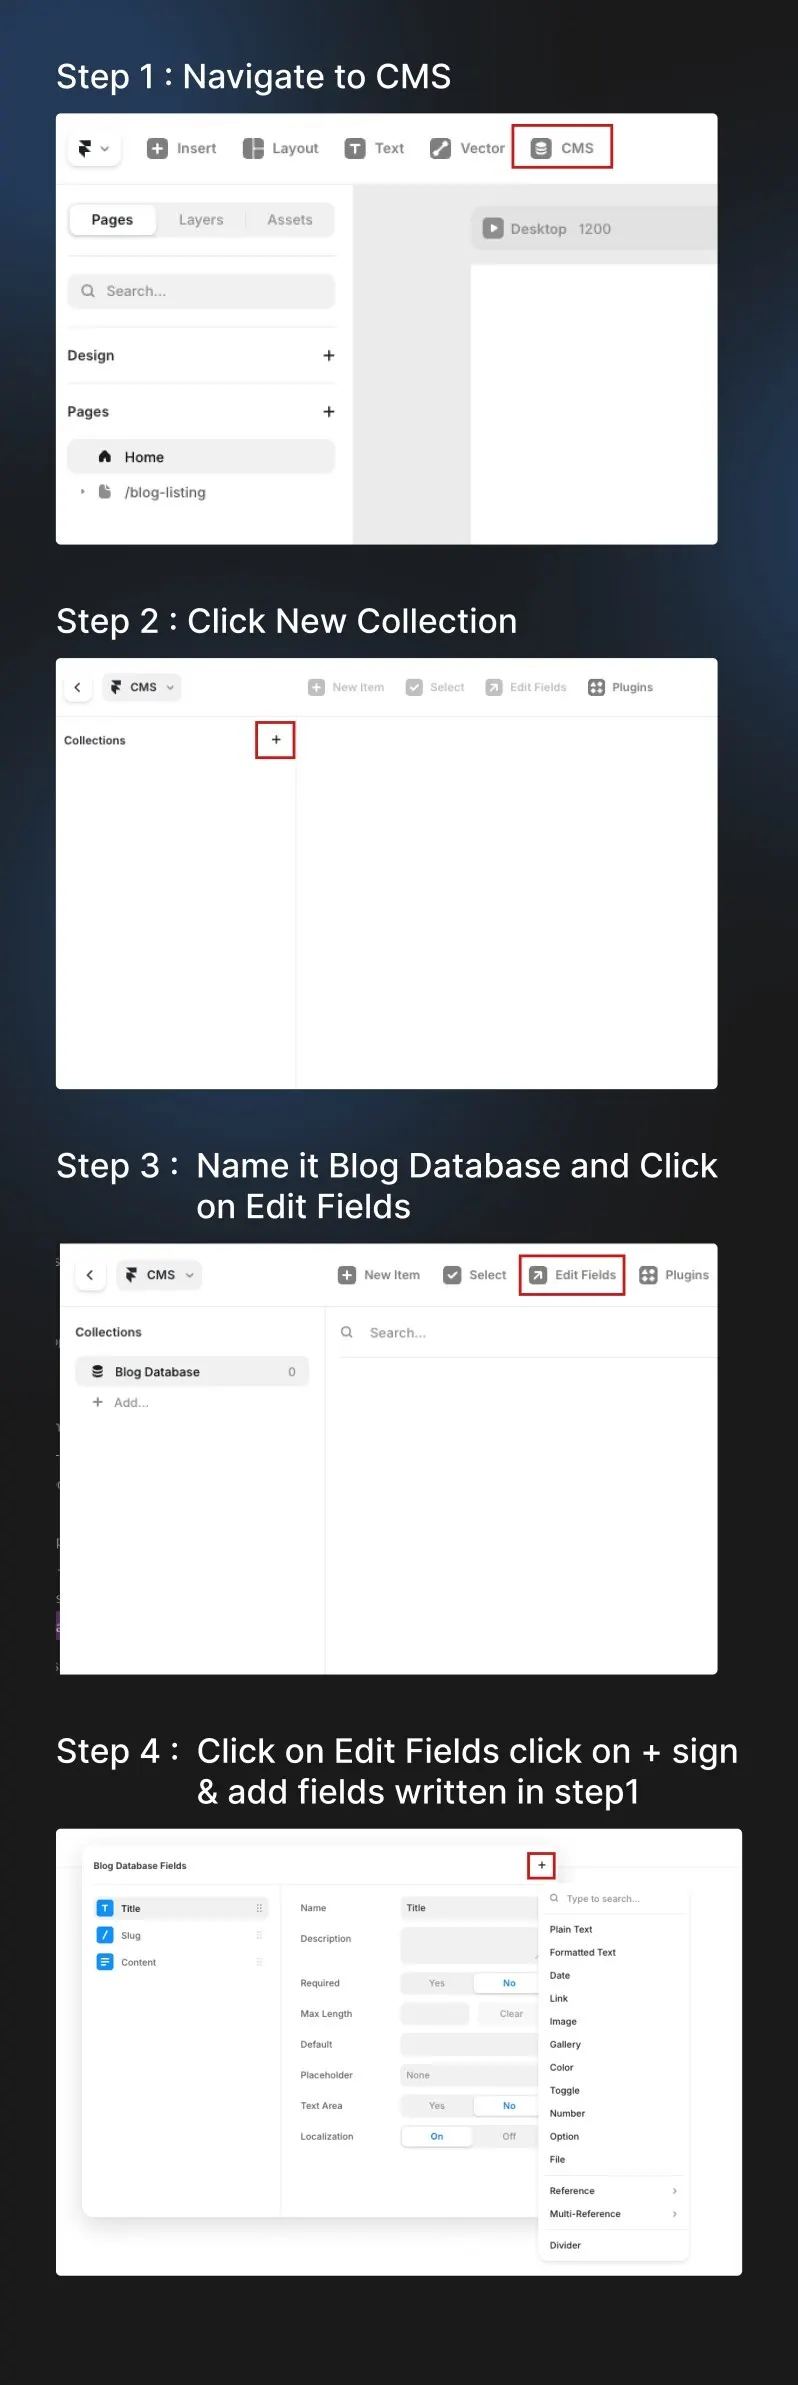
2. Navigate to CMS
3. Click New Collection
4. Name it Blog Posts
Add the following fields:
Title → Plain Text
Paragraph → Formatted Text
Detail Page Content → Formatted Text
Slug (Auto)
Blog Image → Image
Published Date → Date
5. Create Categories and Authors databases, then connect them to the Blog database using a Multi-Reference field for Categories and a Reference field for Authors.
To create a category badge, follow these steps:
Create a new database called Categories.
Add Title Field as Category Name
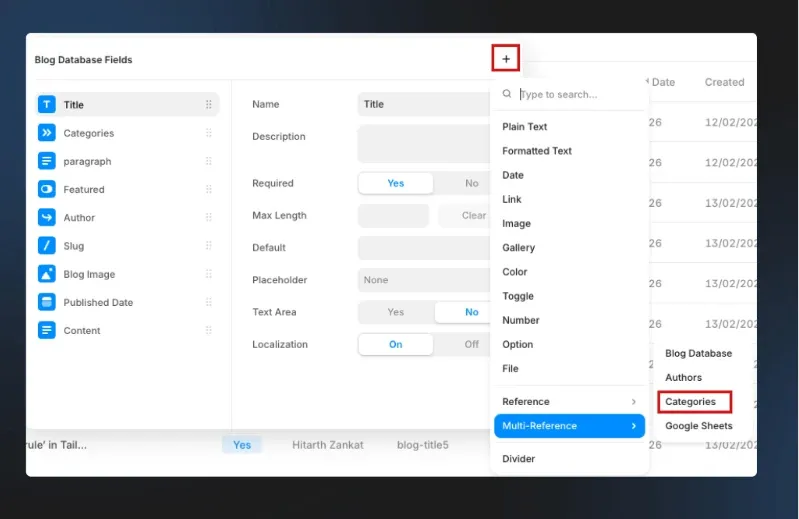
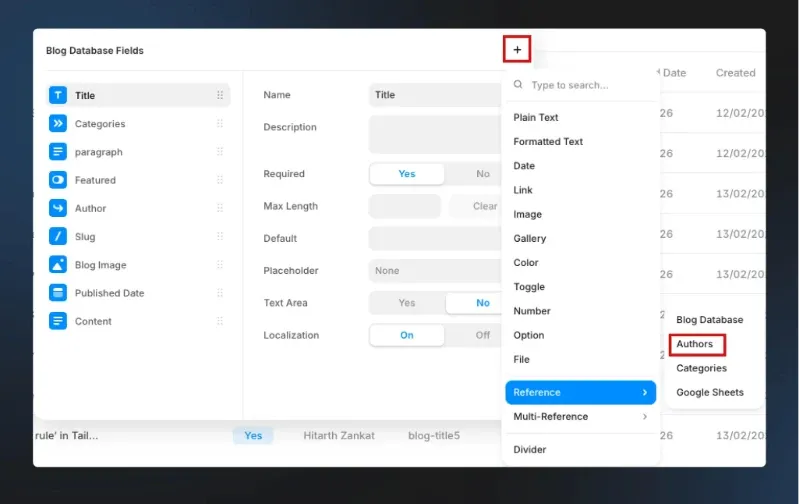
Open your Blog database.
Click on Edit Fields.
Click on the + sign and select Multi-Reference (Multi-Ref).
Choose the Categories database to connect it with the Blog database.
This will link both databases, allowing you to assign multiple categories to each blog post and display them as category badges.
To create an Author detail setup, follow these steps:
Create a new database called Authors.
Inside the Authors database, add the following fields:
Image (for the author’s profile picture)
Title (for the author’s name)
Formatted Text (for the author’s designation or role)
Open your Blog database.
Click on Edit Fields.
Add a new field and select Reference.
Connect it to the Authors database.
Using a Reference field (not Multi-Reference) ensures that you can select only one author per blog post at a time.
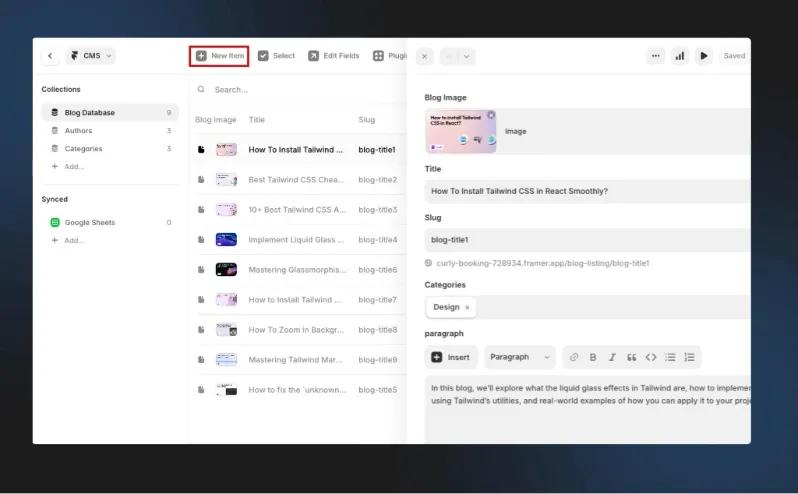
Step 2: Add Blog Posts
Click New Item
Add blog details
Publish the item
Create 2–3 sample posts for testing.
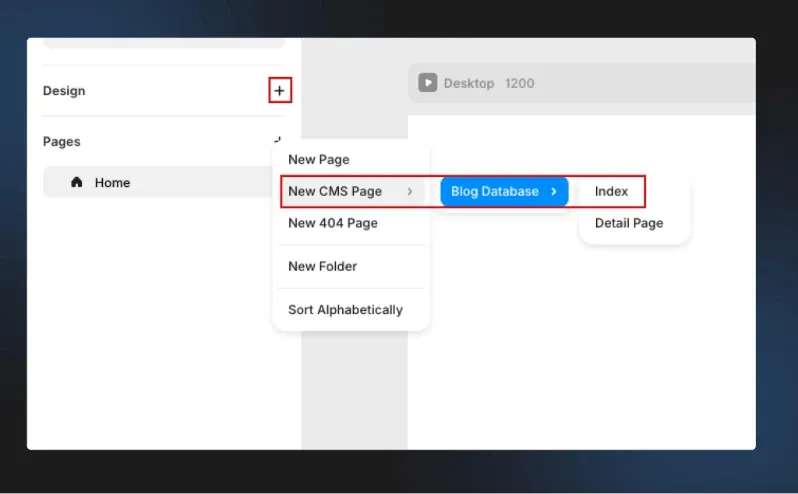
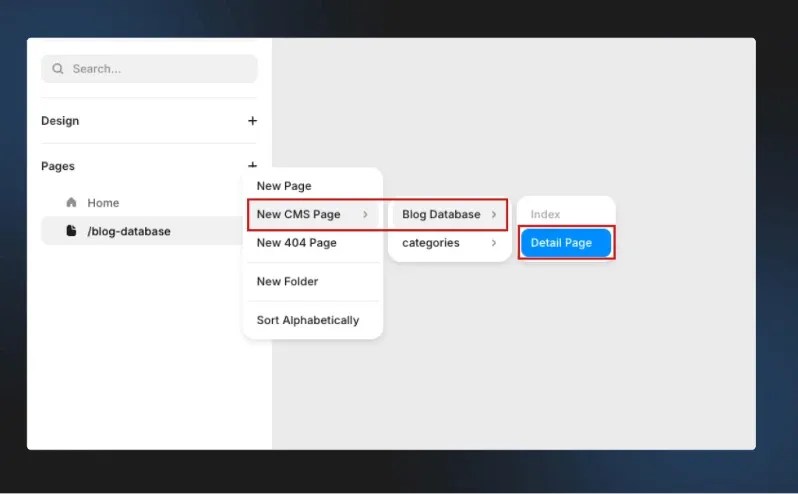
Step 3: Create Blog Listing Page (Index Page)
Click on “+” plus sign
Click on New CMS Page
Select Blog Database
Select Index
Now your listing page dynamically displays all blog posts.
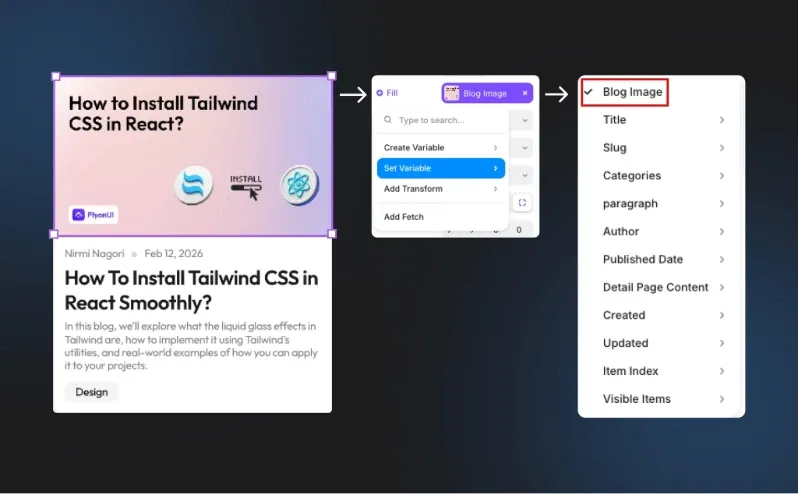
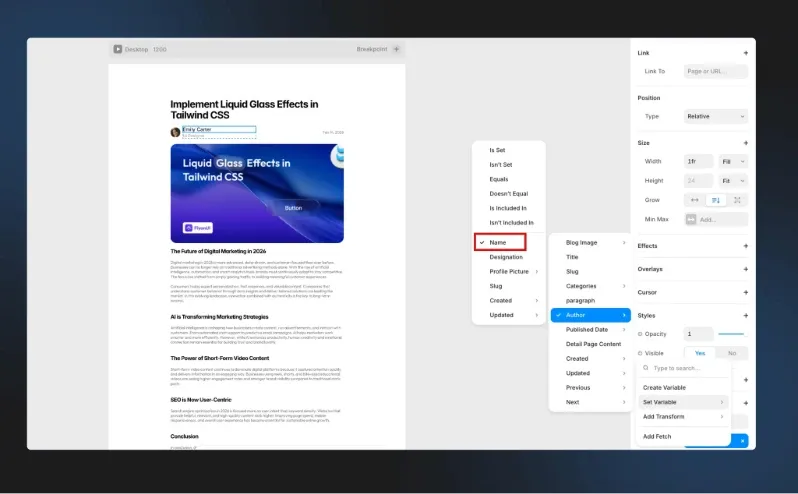
How to Connect Variables
First, select the image. Click the “+” icon next to Fill, then choose Set Variable. Attach it to the variable name you created in the global database (e.g., Blog Image).
For text elements, select the text, click the “+” icon next to Content, and connect it to the corresponding variable (Title, Paragraph, Name, or Date).
Bind all variables in the blog card using the same method, ensuring each element is properly connected to its corresponding database variable.
For the category badge, we will use Framer’s Filters option (along with Sorting and Pagination if needed) to display the category dynamically based on the value assigned to each item in the database.
We will cover this in more detail later in this blog.
Bind Image → Blog Image
Bind Title → Title
Bind Paragraph → paragraph
Bind Author Name → Name
Bind Date → Date
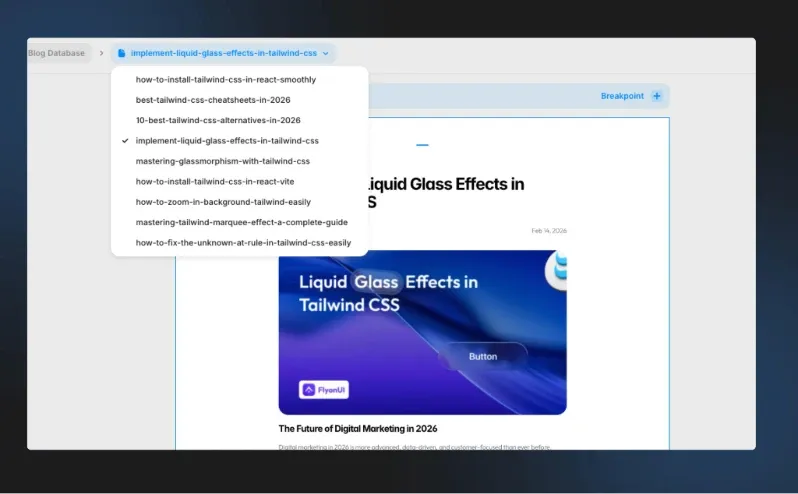
Step 4: Create Blog Detail Page
1. Open the Blog Posts collection
2. Click Create Page
3. Framer generates a dynamic route like /blog/:slug
4. Design the detail page layout:
Bind Title → Title
Bind Image → Banner Image
Bind Author Image → Profile Picture
Bind Author Name → Name
Bind Author Designation → Designation
Bind Date → Date
Bind Blog Detail Content → Detail Page Content
Bind all variables in the blog detail Page using the same method, ensuring each element is properly connected to its corresponding database variable.
Each blog post automatically generates its own detail page. Any layout changes made to one page will automatically apply to all other blog detail pages as well.
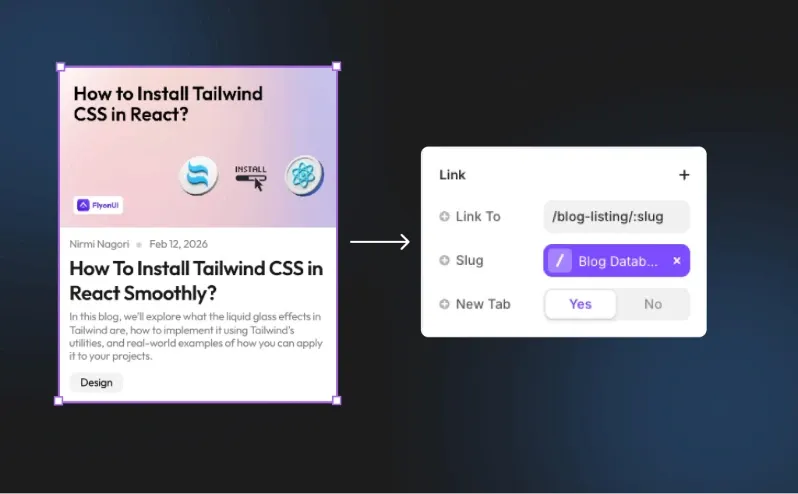
Step 5: Link Listing to Detail Page
Click on the entire blog card component that you want to link.
Go to the right-side panel and find the Link option.
In Link To, enter your dynamic detail page route
/blog-lisitng/:slug
If needed, set New Tab → Yes (otherwise keep it No).
Framer Filters, Sorting & Pagination
Once your blog is working, you can enhance it with advanced features.
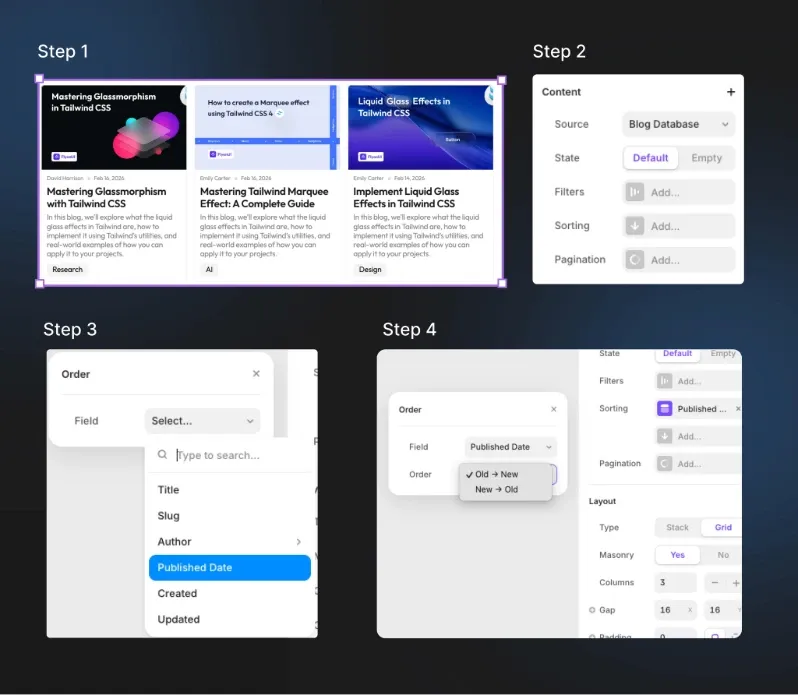
Add Sorting
Select the blog post container that holds all the blog cards.
Go to the right-side panel and click on Sorting.
Click Add Sorting and choose the field you want to sort by — select Published Date.
Set the order to New → Old, so the latest posts appear at the top.
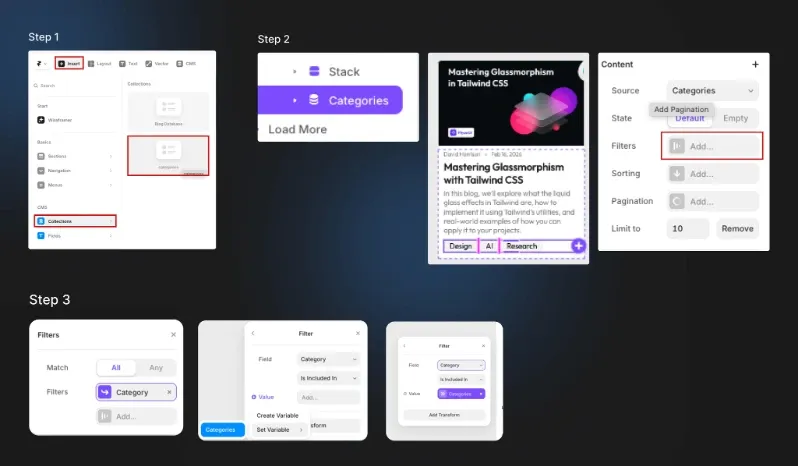
Add Filtering
Go to Insert → Collection.
Select the Categories Database.
Place the collection inside the blog card container.
Style the category items as needed.
Select the Categories container & then open the right-side panel and click on Filter.
Set the condition to Category → Included In → Database Categories.
The blog posts will now automatically filter based on the dynamically assigned category values in the database.
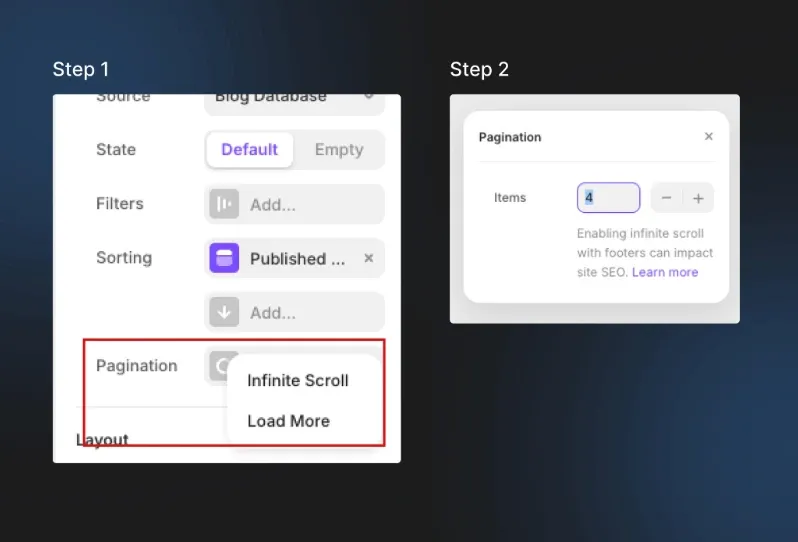
Add Pagination
Enable Pagination in CMS List
You can manually adjust the number of blog posts you want to display.
Condition (Conditional Visibility)
Hide Category Badge If No Category Is Assigned
Select the Categories container (category badge wrapper).
Go to the right-side panel.
Click the “+” icon next to Visible.
Choose the Categories variable.
Set the condition to Is Set.
Conclusion:
Framer CMS makes building and managing a blog simple, scalable, and efficient. By using collections to structure your content, dynamic detail pages to automatically generate individual posts, and powerful features like references, filtering, sorting, and pagination, you can create a professional blog without manually designing each page. Once your blog listing and detail page are properly set up, adding new posts becomes effortless—just create a new item in your collection, and it instantly appears across your website with consistent design and functionality.
