How to Implement Framer CMS in a Template (Simple Step-by-Step Guide)
Learn how to connect Framer CMS to a template and manage blog content dynamically - without rebuilding pages manually.

You’ve picked a Framer template, but how do you connect it to real content like blog posts without rebuilding every page manually? That’s where Framer CMS comes in.
That's exactly what Framer CMS does. This guide explains it in plain, simple words - no jargon - and walks you through the exact steps to set it up inside your template.
What Is Framer CMS, Really?
Think of Framer CMS like a spreadsheet that's connected to your website.
Each collection is like one sheet - for example, "Blog Posts."
Each item is one row - one blog post.
Each field is one column - title, image, date, category, and so on.
Once you design a page layout one time and connect it to this spreadsheet, Framer automatically creates a matching page for every single row. Add a new blog post to the spreadsheet, and a new page appears on your site instantly - no copy-pasting, no rebuilding.
In early 2026, Framer rebuilt this whole system (called CMS 3.0) to make editing much easier - you can now edit content directly in a table, similar to Google Sheets, instead of opening a pop-up for every small change.
Why Use CMS Inside a Template (Instead of Starting From Zero)
A template already comes with the look and feel done for you - fonts, spacing, colors, layout. When you connect CMS to a template instead of a blank page, you get:
A ready-made design for every blog post or content page
One layout that stays consistent everywhere, automatically
A much faster launch, since you're not designing from scratch
A clean split: you (or a designer) handle the look, and anyone can handle the content later - no design skills needed
Still looking for the right starting point? Browse our Framer Templates and find a template that already matches the structure of your website.
Step-by-Step: Setting Up Framer CMS in Your Template
Step 1: Create Your Collection
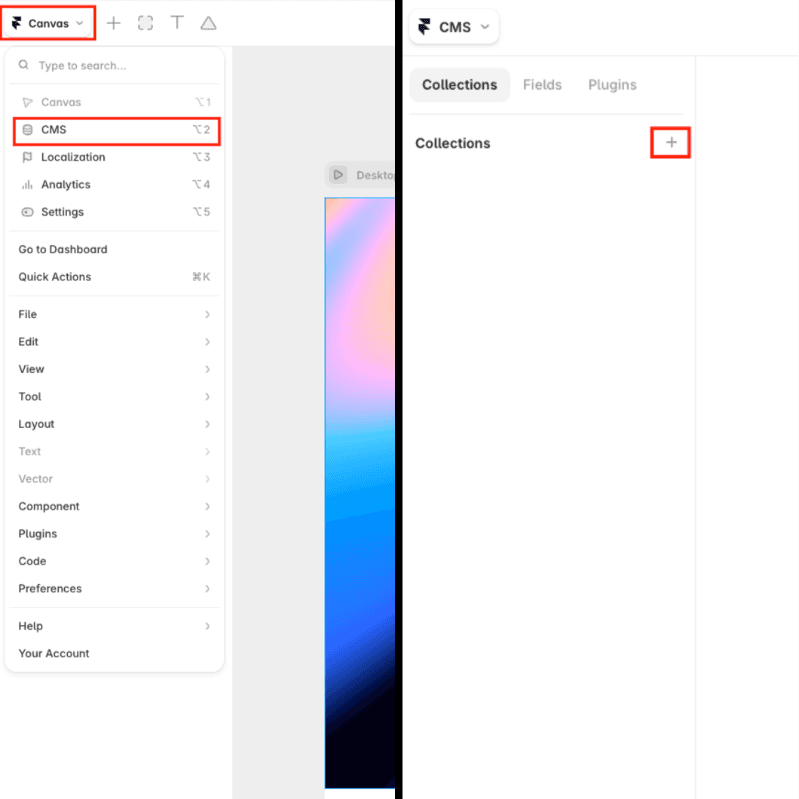
Open your Framer project. In the left sidebar, click the CMS icon (or just press C), then click New Collection.
Give it a clear, simple name. "Blog Posts" is better than just "Posts." Clear names matter a lot once someone else - a client, a teammate - is the one adding content later.
Step 2: Add Your Fields (Columns)
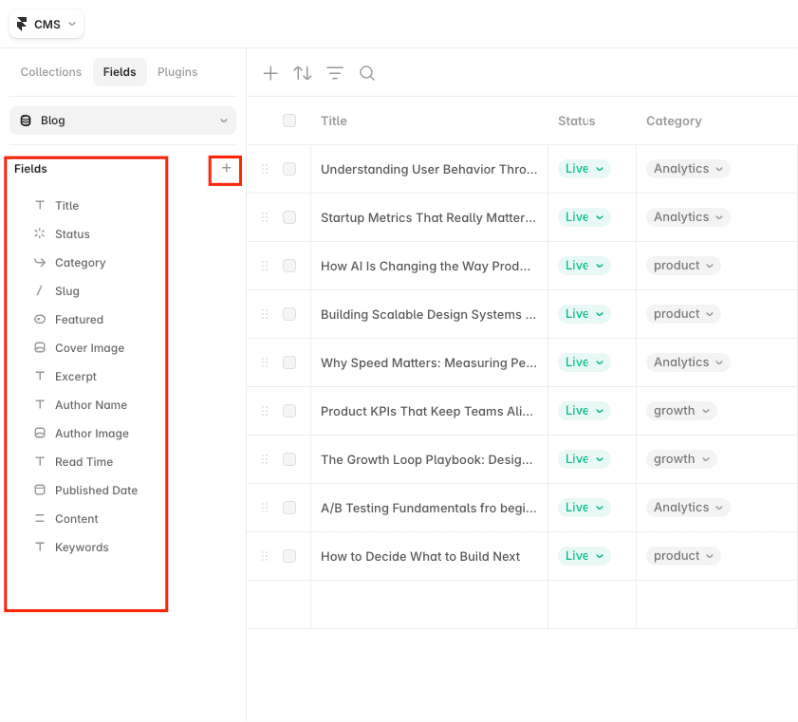
These are the pieces of content each blog post will need. For a typical blog, add:
Title
Slug (the web address part - Framer usually creates this automatically)
Featured Image
Publish Date
Category or Tags
Main Content (rich text)
SEO Title and Description
If you want posts to link to an "Author" or "Category," you can use a reference field, which connects one collection to another instead of typing the same info over and over.
Step 3: Connect Your Template's Design to These Fields
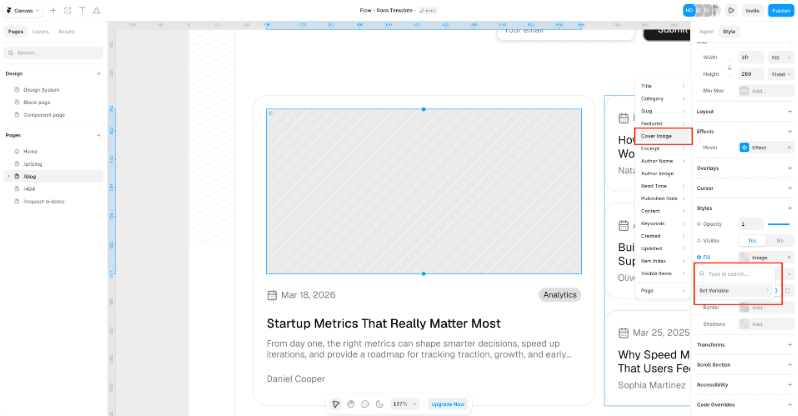
This is the important part - the part that actually makes your template "come alive."
Click on a text box in your template (say, the blog title). Open its settings, click the small connector/plus icon, and choose Set Variable, then pick the matching CMS field. Do the same for the image, the date, and anything else. Once this is done, that layout will automatically show the correct content for every single blog post - you never touch the design again.
Step 4: Turn Your Template Into a CMS Detail Page
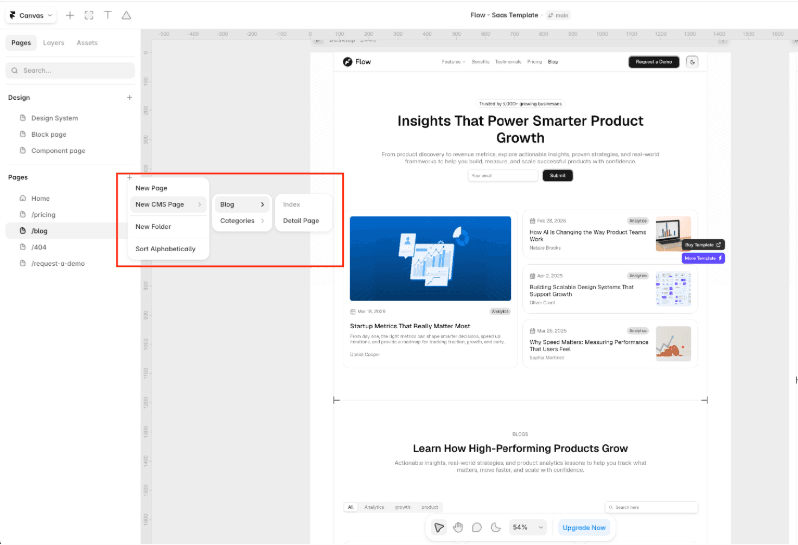
Go to the Pages tab, click the plus (+) icon, and choose New CMS Page. Pick your collection, then choose Detail Page.
Framer will now automatically generate one full page per blog post, using the layout you just connected. Add 50 posts, get 50 pages - with zero manual page-building.
Step 5: Show Your Posts on Other Pages Using a Collection List
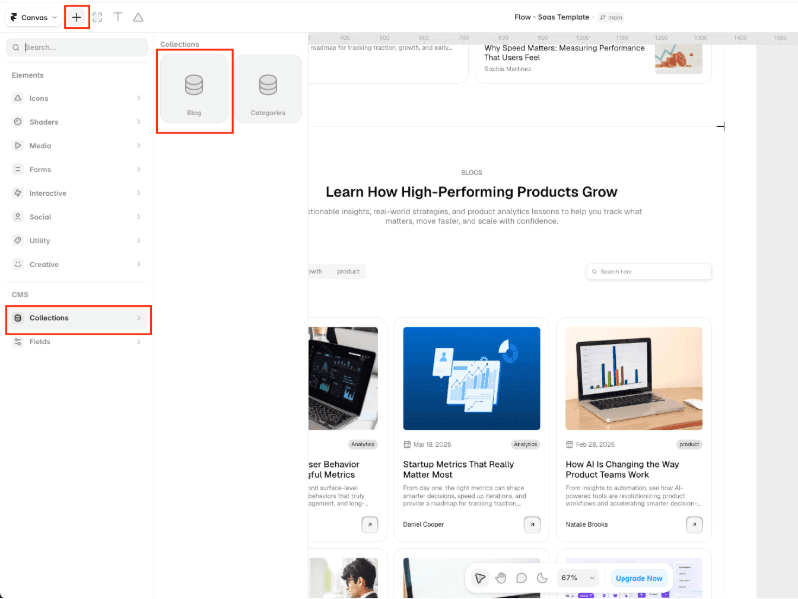
Your blog needs a main page listing all the posts, right? Use Insert → Collection Lists, and drag your collection onto the page. This builds a repeating grid or list of cards (image, title, short preview), and each card links to its own detail page automatically.
You can also drop a small Collection List on your homepage - showing just the 3 newest posts, for example, with a "Read all posts" button.
Step 6: Add Filters (Optional but Useful)
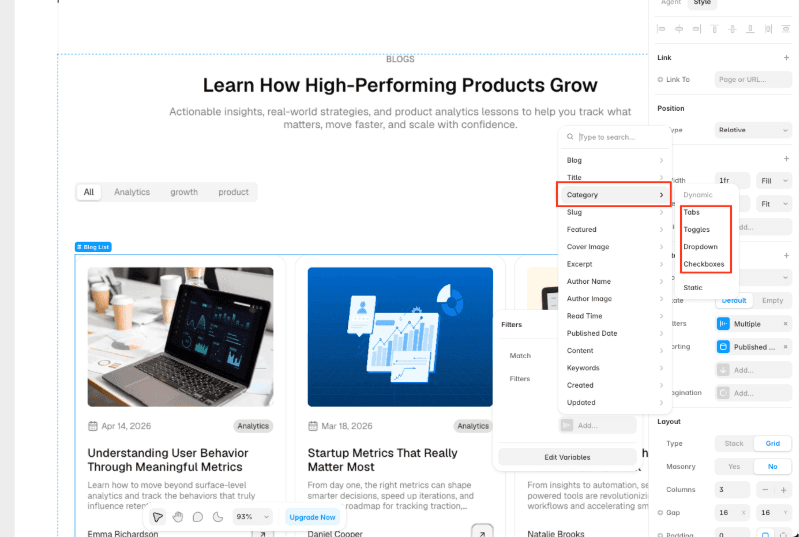
If your blog has a few simple categories, Framer's built-in Dynamic Filters work great - visitors click a category, and the list updates instantly. If you need more advanced filtering (price range + location + type, for a directory site, for example), native filters won't be enough, and a CMS plugin from the Framer Marketplace is the better route.
Step 7: Fill In SEO Fields for Every Post

Each blog post should have its own SEO title, meta description, and social preview image - don't rely on one generic setting for the whole site. Connect these fields to Framer's page SEO settings so every post is properly optimized for Google individually. With CMS 3.0, you can now edit these SEO fields for many posts at once, right inside the table - no need to open each post separately.
Step 8: Preview, Then Publish
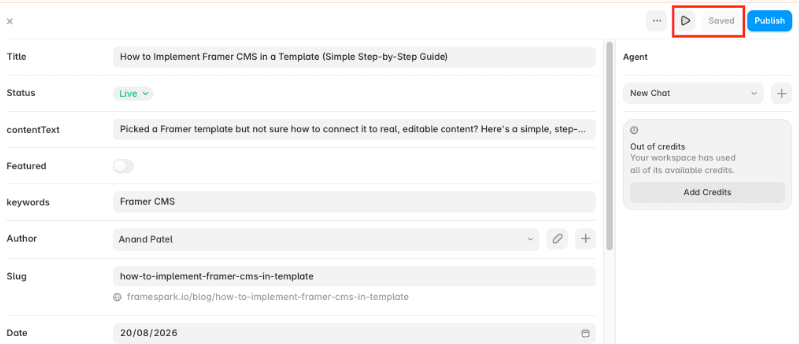
Before going live, check how your template looks with real content - long titles, missing images, different screen sizes. This step catches most layout problems early. Once it looks right, hit publish. Changes go live instantly, with no separate technical deployment step needed.
A Few Simple Tips That Make a Big Difference
Resize your images before uploading. Around 1200–1600px wide is enough for most featured images. This keeps your site fast.
Build your design system first. Buttons, cards, and sections built ahead of time make connecting CMS fields much quicker later.
Don't go over ~200 items per collection if you can help it. Framer CMS works great up to that range. Beyond it - think 500+ posts, multiple writers, complex data - a headless CMS paired with Framer works better.
Design what an empty state looks like too. What should the page show before you've added any posts yet? Plan for that.
What Framer CMS Can't Do (Yet)
It's a great tool, but it's not a full replacement for advanced systems. As of 2026, it still doesn't support:
True multi-language collections (though translated metadata is now possible separately)
Version history for individual entries
Unlimited items - your plan decides the cap
Deep, complex filtering without a plugin
If your project needs those things, pairing Framer with a headless CMS is the standard workaround.
Want to skip the setup from scratch? Check out our CMS-ready Templates to start with a pre-built design that’s ready to connect to your content.
Wrapping Up
In short: create a collection, connect your template's design to its fields, turn that template into a detail page, and list everything using a Collection List. Do this once, and your template becomes a fully working, easily updatable blog - no rebuilding pages, no developer needed for everyday content updates.


