How to Add Dark Mode in Framer: A Complete Step-by-Step Guide
Learn how to add a smooth dark mode to your Framer website without coding. Set up dark colors, add a theme toggle, update assets, and create a polished experience for your visitors.

A complete, beginner-friendly guide to building a smooth Framer dark mode toggle — no coding
experience needed.
If you've spent any time browsing the web lately, you've probably noticed a small moon or sun icon tucked into the corner of most websites. That little switch controls dark mode, and it has quietly become one of the most expected features on modern websites. Visitors don't just like having the option anymore, many of them actively look for it.
The good news is that adding Framer dark mode to your site is far simpler than most people assume. You don't need to write a single line of code, and you don't need to design two separate versions of your website. Framer has built-in tools that handle almost all of the heavy lifting for you.
Tip: Looking for a Framer template with dark mode already built in? Explore our collection of Framer Templates to find modern, ready-to-use designs with polished light and dark themes, so you can start your next project faster.
In this guide, we'll cover everything from what Framer dark mode actually is, why it matters, and a full step-by-step walkthrough for setting it up. Along the way, you'll also find practical tips sprinkled throughout to help you avoid the small mistakes that make dark mode look unpolished.
What Is Framer Dark Mode?
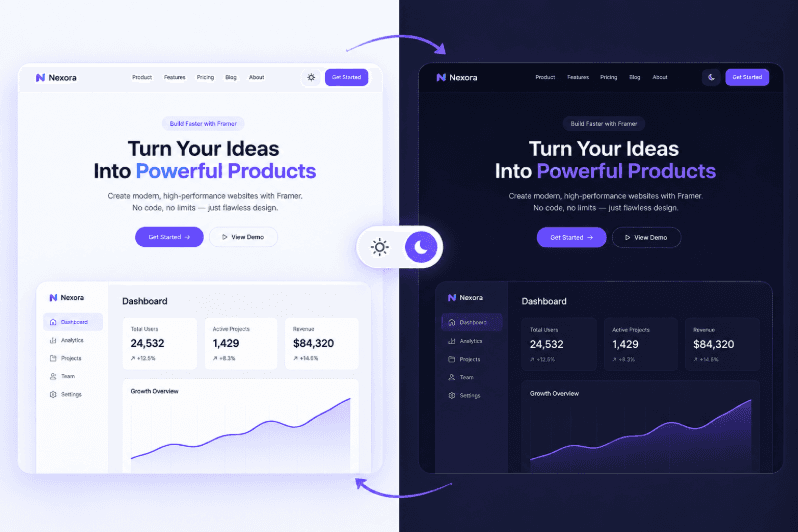
Framer dark mode is a built-in feature that allows your website to switch between a light color theme and a dark color theme. Instead of manually building two separate websites, Framer lets you define both sets of colors once, inside the same project, and switch between them instantly.
Visitors can either toggle the mode themselves using a switch on your site, or the site can
automatically detect and match the dark or light setting already configured on their device. Either
way, the underlying layout, content, and structure of your site stay exactly the same. Only the colors change.
Why Dark Mode Matters for Your Website
It's easy to think of dark mode as just a cosmetic feature, but it actually plays a real role in how visitors experience your site.
• It reduces eye strain, especially for visitors browsing at night.
• It saves battery life on phones and laptops with OLED screens.
• It gives your website a more modern, premium feel.
• It signals that you care about accessibility and user comfort.
• It can even improve the time visitors spend on your site.
Tip: Think of dark mode as part of your design system, not an afterthought. Plan your dark colors at the same time you plan your light colors, rather than bolting them on at the end.
Before You Start: A Few Things to Check
Before diving into the settings, it helps to do a quick pass over your existing site. Make a mental note of where you're using strong background colors, images with transparent backgrounds, and icons or logos that are a single solid color. These are the exact spots that tend to break when you flip a site into dark mode, so knowing about them ahead of time will save you some back-and-forth later.
How to Add Dark Mode in Framer: Step-by-Step
Follow these simple steps to enable dark mode and create a consistent experience across your Framer website. 👇
Open Your Framer Project
Start by opening the project where you want to add dark mode. If you're starting from scratch, create a new Framer project first so you have a clean canvas to work with. Working on a fresh project also makes it easier to build good color habits from the very beginning.Go to the Appearance Settings
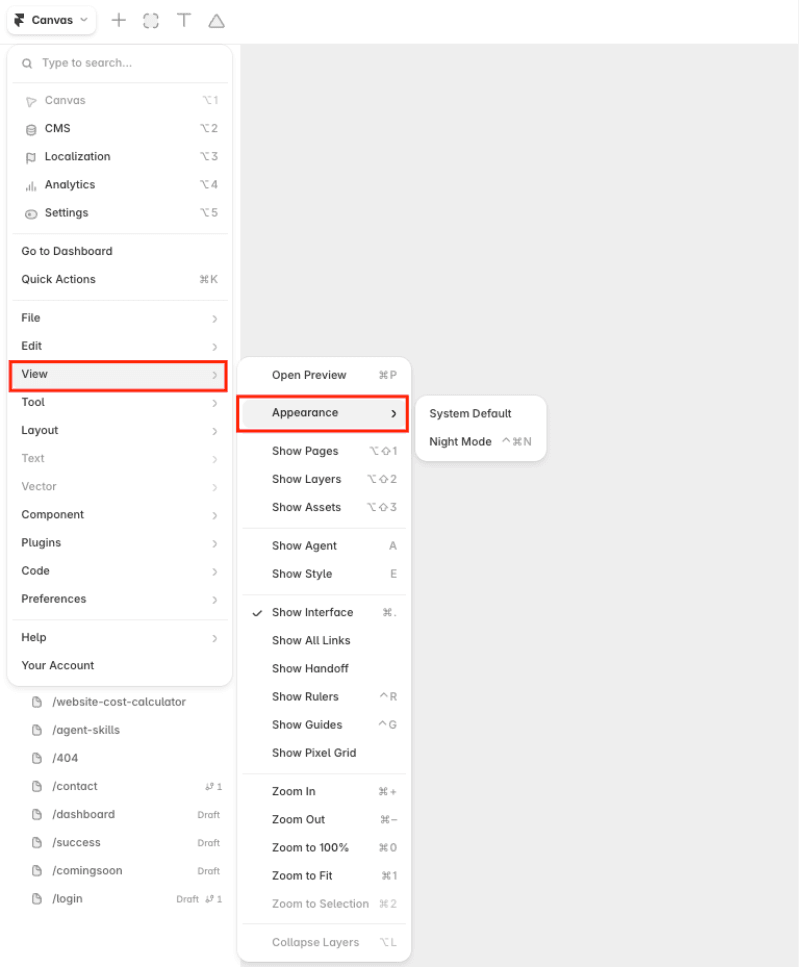
In the top-left corner, click the Canvas dropdown menu to open the main menu. From there, hover over View, then select Appearance from the submenu. This is where you can manage the Framer editor’s appearance, including Light, Dark, or System themes.Turn On Dark Mode
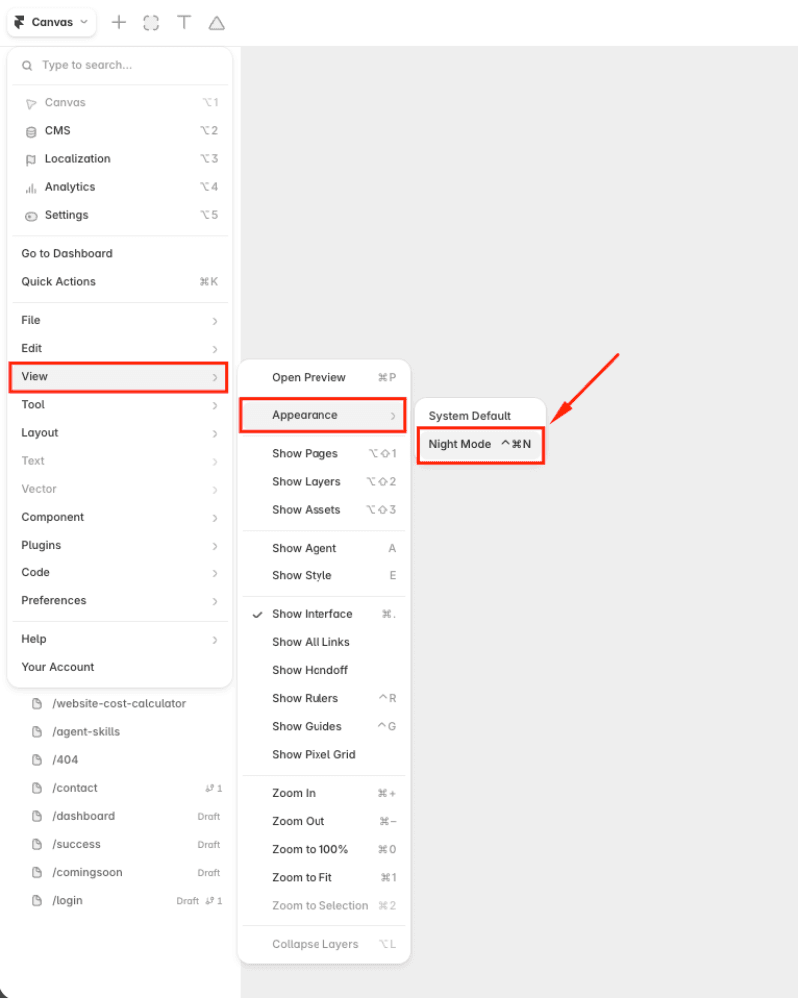
Inside the Appearance settings, you'll find an option to enable Dark Mode. Switch it on. Once enabled, Framer automatically unlocks the ability to set separate color values for light and dark themes across every part of your site.
Tip: Right after turning on dark mode, decide whether you want it to sync with the visitor's device settings or default to light mode. Starting with device sync usually feels more natural to visitors.
Set Your Color Styles
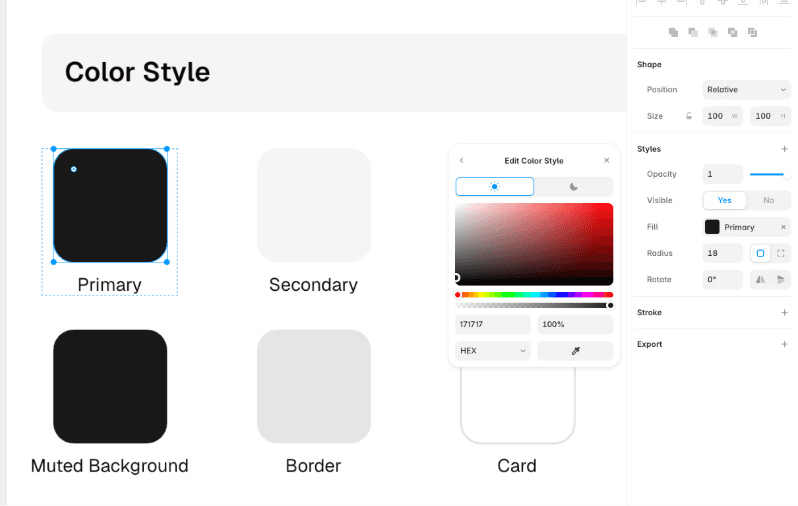
Open your Color Styles panel. For every color you've used across your site, backgrounds, text, buttons, borders, and cards, you can now set a matching dark mode version. For example, a white background in light mode might become a deep charcoal in dark mode, and black text might shift to a soft light gray instead of pure white.
To keep things consistent, Framer adds a “dark” color variable alongside your existing color variables. These dark mode variables are automatically recognized and applied when dark mode is enabled.Note: Make sure these color variables are attached to your website content before this point. This ensures your site content uses the correct color variables when switching between light and dark modes.
Update Images, Icons, and Logos
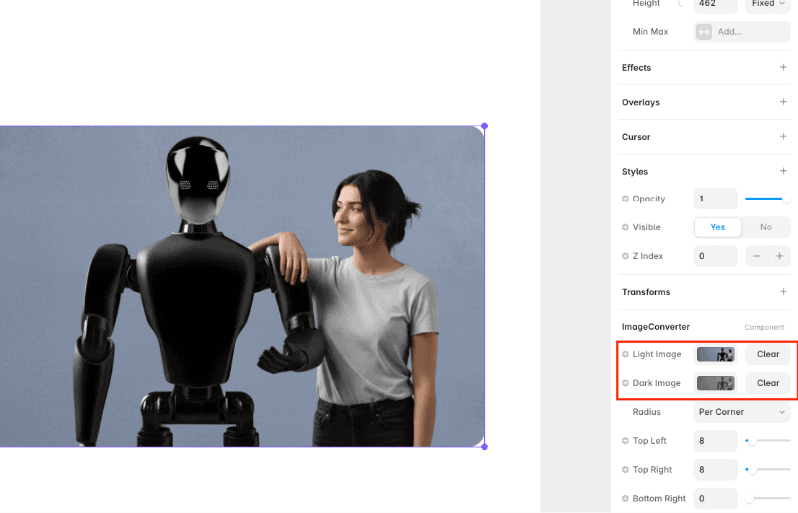
Go through your site and check any image-based elements. Logos and icons that were designed for a light background often lose contrast or disappear entirely on a dark background. If an image, icon, or logo doesn't work well in both themes, you can use a code component to show a different version for light and dark mode, so prepare a dark mode-friendly version of your logo and swap it in where needed.
Tip: Keep a dedicated 'dark mode assets' folder with alternate versions of your logo and icons. It makes swapping them into different components much faster.
Add a Dark Mode Toggle
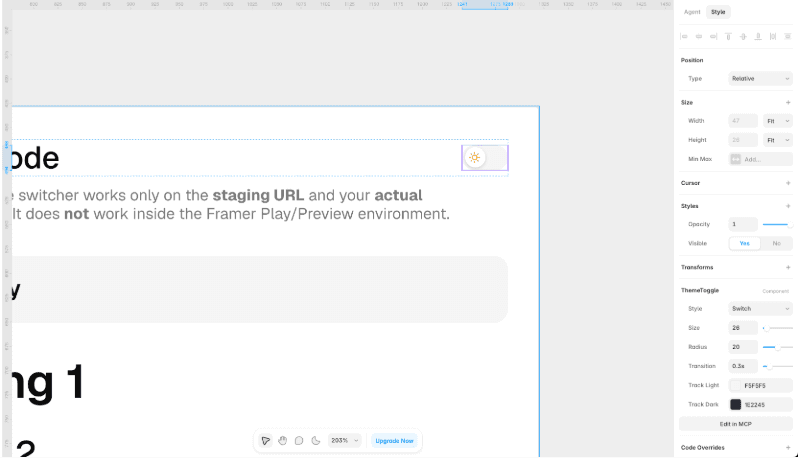
Framer includes a ready-made Dark Mode Toggle component. Drag it onto your navbar or footer so visitors have an easy, visible way to switch between light and dark themes manually, even if their device is set differently.Preview Both Modes
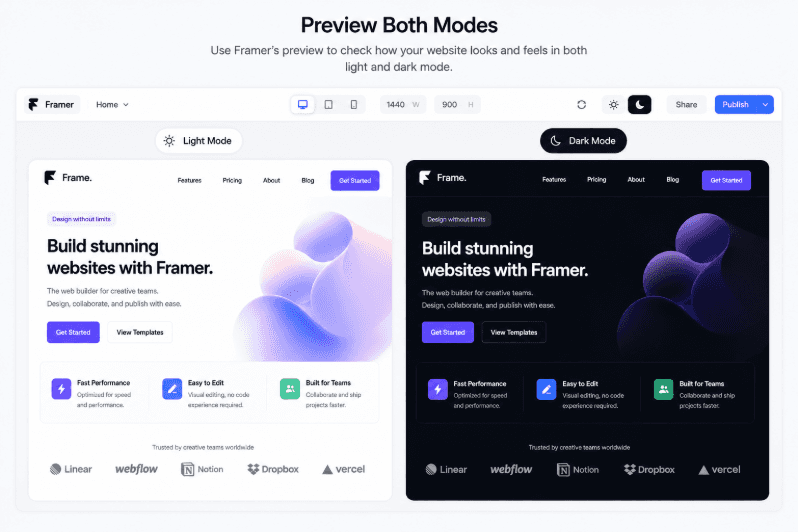
Use Framer's preview option to check how your site looks in both light and dark mode. Pay close attention to text contrast, image backgrounds, button visibility, and hover states, since these are the spots where things most commonly look off after a theme switch.
Tip: Zoom out and view full pages, not just individual sections, while previewing. Contrast problems are often only obvious when you see a whole layout at once.
Publish Your Site
Once everything looks clean and readable in both themes, hit publish. Your Framer dark mode is now live, and visitors can enjoy a smoother, more comfortable browsing experience no matter what time of day they land on your site.
Common Mistakes to Avoid
Even with Framer handling most of the technical work, there are a handful of small details that are easy to overlook.
Forgetting to update icon colors when switching themes.
Using low-contrast text that becomes unreadable in dark mode.
Not testing on mobile, where dark mode issues are often more noticeable.
Leaving shadows too strong, which look odd and heavy on dark backgrounds.
Reusing the exact same accent color without checking it still pops on a dark background.
Testing Your Dark Mode Like a Visitor Would
Once your site is live, don't just glance at it once and move on. Open your site on a few different devices, a phone, a laptop, maybe a tablet, and actually read through the content in dark mode the way a real visitor would. Click buttons, hover over links, and scroll through longer pages. This kind of casual testing tends to catch issues that a quick preview inside the editor can miss.
Final Thoughts:
Adding Framer dark mode to your website is a simple, high-impact way to make your site feel more modern, comfortable, and user-friendly. With Framer's built-in tools, you don't need any coding knowledge, just a thoughtful pass through your color styles, images, and appearance settings.
Looking for a ready-made starting point? Explore our Dark Mode Supported Framer Templates to find templates with dark mode already built into the design.
Take your time testing both themes, apply the tips shared throughout this guide, and you'll end up with a clean, professional dark mode that visitors genuinely enjoy using


